Table Of Content
Hurling a club to hit somebody is just a slight extension of this basic tool, so it's not a stretch to suppose that this was a common use of the club. But the boomerangs he most treasures, Darnell says, are the ancient wooden ones. Aborigines made rangs for hunting, fishing and imitating the flight of hawks; they made boomerangs to catch on the edge of an enemy's shield and hit him from behind. Nearly all have some unique feature that Darnell tries to incorporate into one of his own designs.
Step 8: Finish
But his first love is boomerangs, which he began to make as a child after losing one too many gliders. ("For a 12-year-old, that's devastating," he says.) Today, his boomerangs are used by more competitive throwers than those from any other single boomerang designer. To create a boomerang, Darnell relies on a little theory and a lot of experimentation, often with previous designs. "I have about a thousand rangs in my barn that I use for inspiration," he says. Some of them came from well-wishers and some from obscure shops -- several are even made from the same exotic carbon fibers used in submarines.
Guinness World Record – Smallest Returning Boomerang
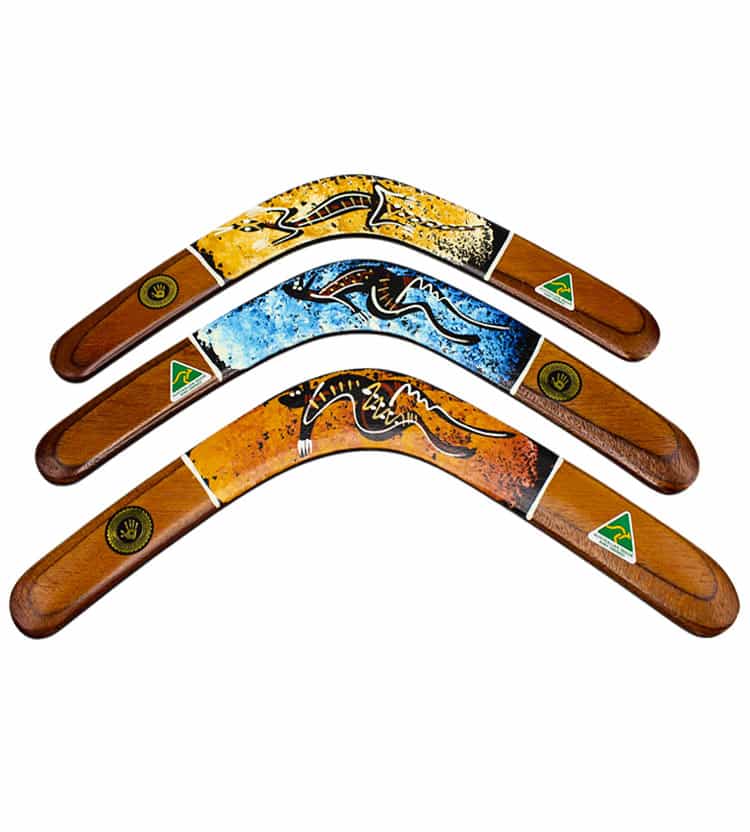
"In addition, the holes slowed the rate of spin, making this boomerang easier to catch," Darnell says. While others just hurl their rangs -- as aficionados call them -- Darnell tries to be as meticulous and scientific as possible about the objects he refers to as "my kinetic sculptures." To create our third design we have used a boomerang and serpent from our sheet of Aboriginal Art Images along with a circular symbol to represent the sun. To create our second design we have used the image of a boomerang from our sheet of Aboriginal Art Images along with the symbols for a star and a moon from our sheet of Aboriginal Art Symbols. To create our first design we have used the image of a boomerang from our sheet of Aboriginal Art Images along with the symbol for a campsite from our sheet of Aboriginal Art Symbols.
Step 7: Painting and Varnishing
Instagram Redesigns App With Black-and-White Theme - TIME
Instagram Redesigns App With Black-and-White Theme.
Posted: Wed, 11 May 2016 07:00:00 GMT [source]
The foil should take up 1/3 to just under 1/2 of the surface of the boomerang. Decorating materials (paint, markers, etc.)Time for Completion Based upon prior experience and familiarity with tools, the estimated completion on this project is 1-3 hours. Hold the boomerang in the palm of your hand, flat side on your palm.
WCC Adding Industrial Tech And Engineering Building, Seeking Public Donations - JoCo Report
WCC Adding Industrial Tech And Engineering Building, Seeking Public Donations.
Posted: Wed, 30 Nov 2022 08:00:00 GMT [source]
Now that you have sketched out the foils you are ready to form them. The formation of the foils will determine how well your boomerang flies and returns to you.1. This can be done by hand or with a belt sander, the belt sander is recommended as sanding by hand will take several hours.2. Begin by sanding along the outline, you want the edge to be sharp to the bottom of the boomerang.3. When sanding the foil there will be a gradual slope from the boomerang edge to the end of your foil.4.
Step 3: Smooth, Trace, Sand
This can be done by hand with sandpaper or using a belt sander, whichever the user prefers. Also, you'll need to bear in mind that you can make the boomerang left or right-handed depending on which side of the wing your leading trailing edges are on. For right-handed boomerang throwers, you'll want the leading edge to be on the right edges of each wing as you look down from above. For left-handed throwers, you'll want them to be on the left side. Trace your template onto your wood, clamp the wood down and start cutting! If you're left-handed, flip the pattern upside down (later, you'll see why).
Step 4: Cutting Out the Blank
Next, you’ll use cutting tools to carefully shape the wood according to your template. Additionally, gloves can be worn to protect your hands from splinters and cuts while handling the wood. Ensuring that you have all of these tools and materials on hand before starting your boomerang woodworking project will help make the process go smoothly and safely. In addition to the necessary tools, there are also specific materials that are required for creating a boomerang woodworking.
The Components for Aboriginal Boomerang Design 3
Take your time on this and don't worry too much about being incredibly accurate, cutting too close to the line. You can always touch up any rough edges by sanding at a later stage. Cutting out a boomerang can be done a few different ways.
How This Woman Paints Hyperrealistic Nail Art
Evidently, the Aborigines perfected the boomerang design and throwing technique for the simple pleasure of it, and the boomerang has mostly been used as sports equipment ever since then. The standard game is to see who can throw the boomerang the farthest and still catch it on its return. The boomerang did have some limited use in hunting, however. The Aborigines would set up nets in trees and then throw the boomerang into the air while making a hawk call.
Unfortunately, early prototypes circled too tightly -- traveling only 16 yards before returning. Darnell corrected this problem by putting a single hole near the end of each wing. This spoiled just enough lift to allow the rang to sail out farther -- to 27 yards. LIFT Air passing over the curved top of a boomerang's airfoil -- at the leading edge of the wing -- is forced to go faster than air passing over the relatively flat underside. As described by Bernoulli's principle, this generates less pressure above the wing, creating upward lift.
This would scare flocks of birds so they would fly down into the nets. After sanding your edges to the proper angles your are ready to throw your boomerang. In the picture you can see several boomerangs in various stats of completion.
On the bottom side, just give it a quick pass with medium grit to get rid of the sharp edges. A boomerang comes back because its wings are shaped like those of an airplane, but less streamlined (like in the 1st picture of this step). Believe it or not, but boomerangs come in right-handed and left-handed versions.
Another creative feature to consider is the addition of decorative painting or staining. This allows for personalization and can be used to create eye-catching designs or patterns on the boomerang. When it comes to making a boomerang woodworking, there are several creative ways to add unique distinguishing features that not only enhance its appearance but also contribute to its performance.
Once completed, your boomerang will be ready for testing and showcasing its flight capabilities. By paying close attention to design and measurement details, you can create a boomerang woodworking that not only looks impressive but also delivers exceptional performance when thrown. In this section, we will delve into the significance of boomerangs and their cultural importance before moving on to the practical aspects of creating one. Whether you’re an experienced woodworker or just starting out, making your own boomerang can be a rewarding and educational project. Let’s get started by exploring what makes a boomerang woodworking special and how you can embark on this woodworking journey. If your boomerang doesn't fly like you want it to, you can try to vary your throwing style.
It is usually inclined outwards, from a nearly vertical position to 20° or 30°; the stronger the wind, the closer to vertical. The elbow of the boomerang can point forwards or backwards, or it can be gripped for throwing; it just needs to start spinning on the required inclination, in the desired direction, with the right force. One of the most important aspects of creating a boomerang woodworking is selecting the right type of wood for the project. Different woods have varying characteristics that can affect the performance of the boomerang, so it’s essential to carefully consider these factors when choosing materials. Additionally, paying attention to design and measurements will also play a significant role in how well the boomerang flies when completed.
Overall, understanding the characteristics and qualities of different types of wood will allow you to make an informed decision when selecting materials for your boomerang woodworking project. By carefully considering factors such as density, flexibility, and durability, you can ensure that your chosen wood will contribute to creating a functional and high-performing boomerang. Some popular choices for boomerang woodworking include Baltic birch plywood, hard maple, ash, and aircraft grade birch plywood.


No comments:
Post a Comment